

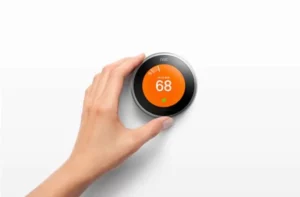
Thanks to the digital age, we can have complex things and mundane life simplified using smart home technologies. One such amazing product is the Nest Thermostat that will allow you as a user to take complete control of your little abode’s cooling and heating mechanism – that too remotely.
So, this brings us to the question, how to change your Nest Thermostat’s owner? Thus, do not forget to read the entire article to the end.
Foremost in the process, you need to remove the product from your account to include the device in your account instead.
If you are in search of the methods to do so, you are at an ideal stop. Herein, you will find the best information surrounding Nest Thermostat and ways to manage its user settings through the app.
How to change the owner to a new one from your Nest Learning Thermostat?
Google proves to be an excellent medium that has allows us to become more innovative, digital, and interactive using its Nest Smart Home systems. Its popular product, Nest Thermostat, allows homeowners and users to handle the heating and cooling of your amazingly.
Do you know your Nest Thermostat can record your cooling and heating habits by closely recording the settings you use frequently? It just takes a week of closely watching your and other’s habits in your home, monitoring which the Thermostat will go on design an automated schedule to heat and cool your home. The ultimate goal is to save energy for your environment and on your energy bills too!
How does it happen?
The system includes an Eco Temperature mode that automatically switches ON when it senses you are away, thereby automating the temperature to cool or heat for saving energy. Besides, you can even access Eco mode when you are at home and far away too.
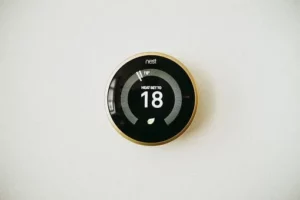
Moreover, you can know if the mode is ON by looking at the green leaf symbol displayed on the screen. This icon on the thermostat screen assists users in saving more energy; furthermore, you can track how much energy you have saved using the Nest App.
Your Nest Learning Thermostat can work wonders even without adding any owner account compared to other Nest devices. All you need to do is use the thermostat dial fixed on the wall to control the air conditioning and heat settings. Perhaps you will require an account for controlling few features; these include:
- A remote thermostat for controlling the system using your smartphone
- Push notifications to your smartphone
- Home and Away Assist process
If you shift home and want to rename the Nest Thermostat, you can do so by giving a new owner to the device. For this, you are supposed to remove your account from the device. In doing so, you will not have any more control over the Thermostat.
Steps to delete your account from your device:
- Log into your Nest app and choose Home. (It is for users who have more than one home account on their Nest system)
- Navigate to settings and select the product you want to delete
- Scroll down and choose to Remove the Nest Thermostat
- Confirm the choice
Suppose you do not like to use your Nest Thermostat, then get a factory reset done to clear all settings. Herein, you can allow new users to restart the product setup, especially if you are away from your home and want to install a thermostat in a fresh location.
However, do ensure to note down the settings for accessing it in the future if need be. For this, navigate to settings – choose equipment for recording system wire, safety temperature, and heating type settings.
How to perform a factory reset on a thermostat system
- Select the thermostat ring button from the Quick View menu in the app.
- Navigate to settings.
- Turn on the ring Reset and click on select.
- Select All Settings. It will reset all personal settings, thereby resetting the device back to default.
Learn more about how to use user settings on the google nest thermostat
The Nest Thermostat makes it easy for you to access the basic settings, including temperature control. For accessing this mode through your smartphone, you primarily must create an account. Later you must add other users in the house to whom you would want to give access.
Here are some important data about Nest and Google accounts:
How to migrate your nest account to your google account
Before you change your Nest Thermostat owner, the Google update must be implemented to all user accounts. As per Google, everyone using Nest Home systems must migrate the accounts to Google. With the new update, users get all rights and permission to use the device as an owner.
However, if you do not have a Google account, it is imperative to create one. On the contrary, if you already have a Google account, it can be used to set up Nest products, wherein you may have an account if you have used other Google products, including YouTube on the internet.
Before you shift your Nest account to Google, you have to log into a unified account for managing all devices and their security. The mere objective of Google is to create a seamless experience using Smart Home devices, allowing the integration of multiple Google Assistant systems and Nest products. For example, you can connect your Google Home on your Nest Thermostat and command, “Google, please increase the air conditioner to 75 degrees.”
Once all Google accounts are migrated to the system, all members will have access and permission to control the original owner. Herein, you can either include or delete devices, modify device settings, link to other devices, and remove or add new users. Thus, it is necessary to ensure the users you are adding are trustworthy.
On deleting your account from Thermostat
It is easy to operate a Thermostat account without adding any users. Herein, you still have the permission to use different permissions after deleting your account from the Nest Thermostat device.
You can use your Thermostat ring for:
- Sensing motion anywhere at your home for switching temperatures on Ecosystem
- Control temperature as per your need
- Remember WiFi data
- Permission to choose between an automatic and manual schedule
- Other functions
- As your Nest Thermostat is still connected to WiFi, the system will continue to interact with Google’s servers, meaning it can receive updates. Besides, it will send information to its IP address to Google. Ensure to disconnect your Thermostat from WiFi whenever you do not want any software update or data logging.
- Experience unique Smart Home system using Google’s Nest Home product comprising of Learning Thermostat. Apart from being a wonderful device, it is also energy-saving. Ensure to visit the Google Store to know more about the Nest Thermostat and its other similar products.
READ: