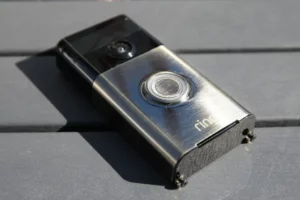
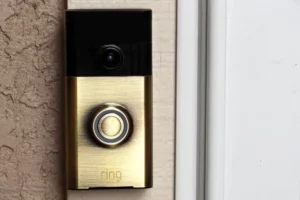
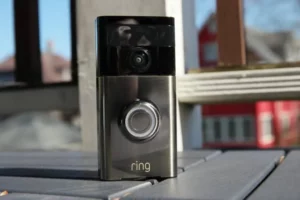
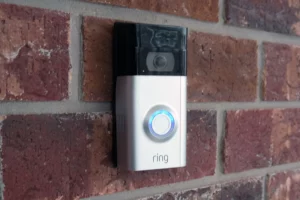
The Ring doorbell is an impressive little gadget. Its primary function is to notify you whenever someone approaches your door, and it aids in safeguarding your property by recording videos after detecting motion. However, there has been concern about potential burglars attempting to forcibly remove the Ring doorbell from the wall or door. Fortunately, there are protective measures in place to address this issue.
To secure the Ring doorbell effectively, it utilizes two main types of screws. The first type is a standard wood screw, which is used for mounting the device. The second type is a special T6 security screw, specifically designed for securing the faceplate. Additionally, there is a less commonly used third screw, employed for mounting the doorbell to a bracket. The sizes of these screws vary across different Ring doorbell models.
Now, let’s delve deeper into the subject to understand why certain Ring doorbells may require screws of different lengths.
Ring Doorbell Details
Ring offers a range of doorbell models, and the primary distinction lies in their power source, either battery-powered or hardwired into the home’s electrical system. Examples of hardwired doorbells include the Ring Doorbell Pro, Pro 2, and Wired, while the Ring Doorbells 1-4, including the 3 Plus and 4 Plus, are battery-powered options.

Despite the variation in power source, most Ring doorbells provide similar features. They all record videos in full HD, offer motion-activated recording capabilities, and do not support continuous 24/7 recording. To access additional features, users can opt for the paid Ring Protect plans.
Now, as for the minor difference between these models, it’s worth noting that the battery-powered Ring doorbells require a slightly longer security screw compared to the hardwired ones, which we’ll delve into in more detail later. But first, let’s address the reason why they incorporate security screws in the first place.
The inclusion of security screws serves as a safeguard against potential theft or tampering of the Ring doorbell. As these devices are typically installed outside the home, they can be vulnerable to theft attempts. By utilizing security screws, which are designed to be more challenging to remove without the proper tools, Ring enhances the protection of their doorbells against unauthorized removal or interference. This security measure helps to ensure that the doorbell remains securely in place, providing reliable functionality and enhancing home security for users.
Different Screws Required for Ring Doorbell
Installing a Ring doorbell involves two main steps: mounting the device on the wall or door and then attaching the faceplate. Each step requires a different type of screw. Let’s go through the details of these screws:
- Mounting the Ring Doorbell:
- For solid surfaces: Two wood screws are used, one at the top and another at the bottom of the Ring Doorbell. If mounting on a solid surface like a wall, wall anchors or plugs are used to provide additional support.
- For bracket installation: If using a bracket (such as a corner bracket), you need to mount the bracket to the wall or door first and then screw the Ring doorbell onto the bracket. This step involves using an additional type of screw (labeled as “C”).
The wood screws used for mounting the doorbell should always be included in the box. The recommended size for this type of screw is a crosshead 8 ga (5/16″) wood screw.
- Securing the Faceplate:
- To enhance security and prevent easy tampering or theft, Ring introduced faceplates that fit over the Ring Doorbell and cover the two mounting screws.
- The faceplate is secured in place with a different type of screw, a T6 Torx security screw. Although Ring refers to them as “security screws,” they are not entirely invulnerable, as a T6 screwdriver can be used to remove them.
The screws used for mounting the bracket and the Ring Doorbell itself have the same crosshead size, while the security screw features a T6 Torx head.

Ring explicitly advises using the T6 Torx security screw at the bottom to avoid puncturing the doorbell and causing damage. Properly securing the faceplate with this screw adds an extra layer of protection to the device.
It’s important to be aware of the sizes and types of screws needed for installing a Ring Doorbell to ensure proper installation and optimal security.
Size of Torx Security Screw
The security screw used by Ring for their doorbells consistently features a T6-head Torx design. However, the crucial difference lies in the length of the screw, which can vary depending on the specific model of the doorbell.
For the hardwired Ring Doorbells, such as the Ring Doorbell Wired, Pro 1, and Pro 2, the T6 security screw is relatively short, approximately around 5mm (1/5″) in length. This shorter screw size is evident from the shallow depth on the doorbell itself where it is installed.
On the other hand, for the battery-powered Ring Doorbells, the length of the T6 security screw can vary significantly from one model to another. For instance, the Ring Doorbell 1 and 2 require a longer security screw, while the newer Doorbell 3 and 4 models may use the shorter 5mm (1/5″) security screw, similar to the hardwired versions.
Due to the variation in screw sizes, it can become confusing to identify the exact screw needed for a specific Ring doorbell model. If you find yourself missing a screw for your Ring doorbell during installation or maintenance, it might be more convenient to purchase one of Ring’s ‘spare part’ kits, which are designed to provide the appropriate replacement screws for your doorbell model.
Now, moving on to the mounting screw size, let’s continue exploring the details of the installation process.
Size of Mounting Screw
Indeed, the mounting screws provided with the Ring doorbell are typically standard wood screws, specifically 8ga 5/16″ crosshead screws, which are approximately 25mm (1″) in length. However, it’s essential to consider that this length is a suggested size by Ring and might not always be suitable for every mounting surface.
Before installing the Ring doorbell, it’s crucial to inspect the surface where you intend to mount it. Different surfaces may require different screw lengths to ensure secure and stable installation. For example, if you plan to mount the doorbell on a solid wall with 1.5″ of crumbling render, the standard 25mm screw would not be sufficient.
In such a case, you would need to purchase screws that are at least 2.5″ long to account for the additional depth of the crumbling render. Using shorter screws in this scenario could result in the doorbell being mounted on an unstable or deteriorating surface, which may lead to issues with the installation’s durability.

In summary, while the Ring doorbell typically comes with 25mm (1″) standard wood screws, it is essential to assess the mounting surface and select the appropriate screw length accordingly. Ensuring a proper fit for the screws will help guarantee a secure and long-lasting installation of the Ring doorbell.
Size of Mounting Bracket Screw
If you need to install your Ring doorbell in a challenging or angled position, you can make use of the corner kit or wedge mounts that are often included in the box. In case your model doesn’t include them, you can purchase these mounts separately. As mentioned earlier, attaching the corner kit or wedge mount involves using the mounting (wood) screws to secure the bracket to your wall or door. Subsequently, a shorter special screw is employed to attach the Ring doorbell to the bracket.
This particular doorbell-to-mounting-bracket screw has a length of 15mm (3/5″) and a 5/16″ wide cross head. It is crucial to ensure you don’t misplace this screw, as it is a custom design with specific features, such as the absence of threads towards the top of the screw.
However, if you happen to lose this screw during the installation process, there’s no need to panic. You have the option to purchase a spare part kit from Ring, which typically contains the necessary replacement screws, including this custom-designed screw.
To summarize, if you find yourself in need of an unconventional installation angle, the corner kit or wedge mount provided or purchased separately can be utilized. Just remember to handle the special doorbell-to-mounting-bracket screw with care, as it is a unique design, and consider obtaining a spare part kit for any unforeseen mishaps during installation.
Screwdrivers is Required For Ring Doorbells
The screwdriver that is included with your Ring doorbell proves to be quite useful, as it comes with interchangeable heads, allowing you to switch between the torx head and a standard cross head. This versatility makes it convenient for various installation tasks.

However, if you happen to misplace the provided screwdriver, there’s no need to worry. There are many other screwdrivers available in the market that come with changeable heads, providing a suitable alternative. Additionally, you have the option to purchase two separate screwdrivers—one with a T6 Torx head for the faceplate security screw and another with an 8ga (5/16″) crosshead for the mounting screws.
So, to effectively install your Ring doorbell, you’ll need the following screwdrivers:
- A T6 Torx head screwdriver (or screw bit) to handle the faceplate security screw.
- An 8ga (5/16″) crosshead screwdriver for the mounting screws.
Having these two types of screwdrivers readily available will ensure you can securely and efficiently install or maintain your Ring doorbell as needed.
Wrapping it up: Lost Your Screwdriver/Screws
If you find yourself in a situation where you have lost the screws or the screwdriver that came with your Ring doorbell, there’s no need to worry. You can easily purchase replacements, and now that you know the exact sizes required, the process becomes more straightforward.
You have a few options to obtain the necessary screws and screwdriver:
- Local Hardware Stores: You can visit stores like Home Depot or Lowes to buy the replacement screws and screwdriver directly. Ensure that you get the correct sizes specified earlier to match your Ring doorbell model.
- Amazon and Ring.com: Both of these platforms offer replacement screw part kits for various Ring doorbell models. You can find the short and long T6 torx screws required for both battery-powered and hardwired doorbells. However, be cautious, as some reviews mention issues with the quality or fit of the ordered screws, which can be frustrating. Buy short and long T6 torx screws from Amazon!
- Ring’s Spare Part Kits: Ring sells a range of spare part kits that cater to different doorbell models they have produced. You can easily find them on their website by searching for “Ring Doorbell [Your Model] spare part kit” in Google. These kits typically include the replacement screwdriver, mounting screws, torx security screws, and sometimes extra wire and wire nuts. While you might have to pay for shipping, it ensures you get the right screws for your specific doorbell model. The cost of these kits is generally reasonable, usually totaling less than $10/£10.
In my opinion, investing in a Ring spare part kit is worth the convenience of knowing you’ll receive the correct and suitable screws for your particular doorbell model. While purchasing from Amazon might be slightly cheaper, there could be concerns about the quality and fit of the ordered screws. With the spare part kit, you can be confident that you’re getting genuine replacement parts directly from the manufacturer, ensuring a proper and secure installation of your Ring doorbell.
You May Also Enjoy Reading: Ring Doorbell Button Has Cracked? (Fixed!)

