I tried to take a sleep on a day that turned out to be unusually hot, but I couldn’t help but notice that the room was far more stuffy than it had been in the morning. After becoming suspicious that there was a problem with the HVAC system, I approached the thermostat in order to do additional research. When I turned my attention back to the monitor, I saw that it was displaying a message that said ‘Cool On’ in a flashing font.
I decided to investigate the vents in order to acquire a better understanding of the matter. During my investigation, I discovered that the HVAC system was not producing any cold air. After further investigation, it was discovered that there was a fundamental problem that needed to be addressed. I was so determined to find a solution to the issue that I set out on a mission to determine the various reasons why the flashing message was occurring and then produced a list of solutions to fix it.
If the phrase ‘Cool On’ is shown on your Honeywell Thermostat, one solution to try is lowering the temperature to its lowest setting. After this, resetting the temperature on your Honeywell Thermostat could be something that turns out to be useful.
In addition, I delved into more in-depth troubleshooting steps, such as inspecting the batteries to ensure that they are functioning properly, checking the AC filters for any clogs or debris that may be hindering airflow, examining the AC coils to ensure that they are clean, and consulting the user manual for additional guidance on troubleshooting particular issues. All of these steps were performed in order.
You will be able to fix the ‘Cool On’ flashing message on your Honeywell Thermostat and restore the cooling functioning of your HVAC system if you take these possible causes of the problem into consideration and follow the actions that are necessary.
Explaining What the ‘Cool On’ Indicator Really Means
On your thermostat, if you see a flashing indicator sign that reads “Cool On,” there is no need for you to be concerned or puzzled if you see this message. This indication is essentially a message that provides information as well as it identifies a mode of operation.
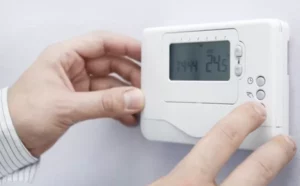
The ‘Cool On’ mode, which is quite similar to the ‘Heat On’ mode, signifies that the cooling operation has begun inside the system unit. It is a natural occurrence and does not imply that there is a problem or that your HVAC system is malfunctioning in any way.
Before resuming its regular behaviour, the ‘Cool On’ sign will flash steadily for a predetermined amount of time, which is typically anywhere between three and five minutes. This mode is meant to shield the compressor of your HVAC system from any possible harm that may be caused, and it may also kick in if there is a loss of power or an interruption in the unit’s power supply.
Therefore, it is essential to have an understanding that the ‘Cool On’ sign is a typical element of the functioning of your HVAC system. As long as the indicator returns to its usual condition within a few minutes, there is no need to be concerned about the issue.
Honeywell Thermostat Blinking Cool On (Troubleshooting)
Even if the ‘Cool On’ sign is there as a precautionary measure, you need to fix the problem as soon as possible if it continues to flash for more than five minutes and you are not receiving any cool air from your HVAC system.
This circumstance points to the existence of a possible issue that needs to be investigated. The following is a list of the procedures that you need to do in order to address the blinking ‘Cool On’ indicator:
Check if the thermostat batteries are drained
Inaccurate performance is possible if the batteries in your thermostat have been depleted or are otherwise in poor condition. It is essential to change the batteries whenever they get depleted. After the thermostat begins flashing a warning that the battery is low, you typically have around two months’ worth of battery life remaining.
On the display of the thermostat, you will see a status indicator for the battery. If the thermostat in your home runs on batteries, changing them out for new ones as often as needed is highly suggested.
However, if your thermostat does not utilise batteries but rather a 24 VAC power supply, you need to check the wiring to ensure that it is installed correctly. To begin, make sure that the system is turned off and then remove the thermostat from the mounting plate it was originally attached to.
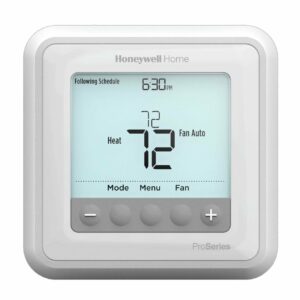
Make sure that the C-wire is connected in the correct manner by checking its connection. In order to get access to the C-wire in certain thermostats, it may first be necessary to detach the wires from the mounting plate.
It is important to take note that if you replace the batteries in your Honeywell Thermostat, it is possible that the display backlight may become inoperable. If this is the case, consult the user manual or get in touch with Honeywell’s customer care to get help in fixing the problem with the lighting.
You can assist preserve the optimum working of your thermostat and minimise interruptions in its performance if you solve any problems that are linked to the battery and ensure that the right wiring connections are made.
Reduce the temperature as much as possible
Checking the thermostat’s ability to accurately control the temperature is the first step in diagnosing and fixing problems with the cooling system it controls. You’ll need to adjust the settings on the controller and make sure the cooling feature is turned on. Adjust the temperature so that it is as low as it can go, and at the same time, make sure that the mode is set to “Cool,” and that the fan setting is on “Auto.”
Allow some time for the system to run after you have made these modifications, and then check to see whether there is any cooling or if there is a discernible difference in the temperature of the room. This will assist you in determining whether or not the thermostat’s cooling function is functioning appropriately.
If, after waiting for a sufficient period of time, you do not feel any cold air or observe a considerable difference in temperature, this may be an indication of an underlying issue that needs more troubleshooting or the intervention of a specialist.
If you follow these instructions, you will be able to evaluate the thermostat’s ability to control the cooling system and obtain insight into any possible difficulties that may be hurting the thermostat’s performance.
Verify the thermostat’s setup mode
It is possible for the thermostat to enter setup mode in the case of a blackout or power loss, which would result in the ‘Cool On’ light flashing repeatedly. This would indicate that the cooling system is not functioning properly. Additionally, the flashing of this indication might be caused by the thermostat not being correctly adjusted or turned off, both of which are possible scenarios.

In order to solve this problem, you will need to carefully go over the thermostat’s settings and adjust them in accordance with the instructions that were supplied. Check to see that the mode and temperature settings on the thermostat are appropriately adjusted so that the cooling system can function as expected. In the event that it is required to do so, consult the user manual or the instructions provided by the manufacturer for more precise assistance on appropriately configuring the thermostat.
You may fix any problems with the flashing ‘Cool On’ sign that were caused by faulty setup or power outages by checking and updating the settings on the thermostat.
Check to see that the components of your HVAC system have electricity
If you have tried all of the above troubleshooting methods, but you are still having problems with your HVAC system and the ‘Cool On’ indication, it is essential to do an inspection of the different components of the system and make sure that they are operating correctly.
To begin, you should give the components of the system a listen to see if there are any sounds that are out of the ordinary, such as clicking or buzzing. This might be an indication that there are problems with the components of the system. It is important to pay regular attention to the components of the heating and cooling system, such as the fans, air handler, furnace, and air conditioning unit, to ensure that they have electricity and are running properly.
After that, check all of the connections, such as the sockets and the supply, to make sure that they are connected properly and that the switches are switched on. Check to see that all of the doors and panels on the HVAC unit are securely shut, and that there are no components that are wobbling or missing their screws, since these might be producing disruptions in the system.
Examine the heating, ventilation, and air conditioning system for any impediments to its normal functioning, such as obstacles or blockages. It is essential to check that the components of the system are operating normally and that there are no obstructions to the passage of air or trash in the way.
In addition, make sure that the circuit breakers that are connected to the HVAC system are not tripped and that they are not in an incorrect condition by inspecting them. In order to analyse the specifics of the problem more thoroughly, you might try shutting off the circuit breaker as well as the HVAC system.
In the event that it becomes required, you are able to use a voltmeter to examine the system for blown fuses. This might be helpful in determining whether or not there are any electrical problems influencing the functioning of the HVAC system.
You may address any possible faults that may be the cause of the flashing ‘Cool On’ indication and restore appropriate operation to your cooling system if you examine the different components of your HVAC system in great detail and do thorough troubleshooting on all of them.
See whether the filter for the air conditioner needs to be replaced
Within your HVAC system, the airflow and air quality are both directly impacted by the performance of the air conditioner filter. There are a few things that may go wrong with your cooling system if the air conditioning filter is unclean or clogged with dust and other particles.
Reduced cooling efficiency is one of the most significant effects that might result from a blocked air conditioning filter. When there is a blockage in the filter, the airflow is restricted. This makes it more difficult for the air conditioning unit to efficiently chill the environment. Because of this, the system needs to labour more vigorously and for a longer period of time in order to attain the correct temperature. This places an unneeded strain on the compressor as well as the various other components.
A dirty filter not only decreases the efficiency of your air conditioner, but it may also have an influence on the quality of the air around your house. A dirty filter is unable to catch dust, allergens, and other airborne particles as efficiently as a clean filter, which results in poor air quality within the building. Occupants, particularly those with respiratory difficulties or allergies, may find themselves in a state of discomfort as a result of this.
In addition, a clogged air conditioning filter may lead to greater levels of energy consumption as well as higher monthly power costs. When the system has to work harder to compensate for the reduced airflow, it uses more energy. This results in inefficiency as well as increased expenses associated with the consumption of energy.
In extreme circumstances, a filter that is too blocked might even prohibit your Honeywell Thermostat from activating the air conditioner. This is a preventative approach that will save the system from being overworked and might save it from being damaged. If you observe a large decrease in temperature or problems with other components of your HVAC system, it might be an indication that your indoor coil is partly frozen or that your registers are blocked, both of which can be related to a clogged air conditioning filter.
It is essential to routinely change the filter in your air conditioner, preferably once every three months or as directed by the manufacturer. Doing so will help to avoid the problems described above. This preserves air quality, increases cooling efficiency, and minimises pressure on your heating, ventilation, and air conditioning (HVAC) system. Maintaining your system’s filters on a regular basis is an easy but crucial step in ensuring that your cooling system continues to operate well.
Check to see whether the AC coils are covered with dust
The exterior air conditioning coils of your heating, ventilation, and air conditioning (HVAC) unit are an essential component of the cooling process. They achieve this by moving heat from the internal air to the outer environment. Because of the dirt, dust, and debris that may collect on these coils over time, their capacity to effectively absorb heat will suffer, which will have a ripple effect on the entire cooling performance of your system.
In contrast to the air conditioner’s filter, which normally has to be replaced more regularly, the air conditioner’s coils typically do not get soiled as frequently. It is possible for the coils to get clogged and hinder airflow if dust and debris are allowed to build up on them over the course of many months or even years of operation.
When the air conditioning coils are obstructed or unclean, they are unable to absorb the heat from the inside air as efficiently as they should. As a direct consequence of this, the process of cooling is hampered, and the overall cooling performance of your HVAC system is adversely impacted. This can result in insufficient cooling, longer cooling cycles, and a decrease in energy efficiency.
It is essential to inspect the AC coils on a regular basis to determine whether or not they need cleaning in order to prevent the coils from being clogged with debris. To begin, turn off the device and clean the area around it to avoid more dirt and debris from gathering on the coils of the fan.
After that, you may go on to cleaning the coils by using either a gentle brush or a coil cleaning solution that was advised by the manufacturer. When cleaning the coils, use extreme caution so that you do not end up causing damage to the fins or any of the other components.
In addition to keeping the coils of the air conditioner clean, it is essential to maintain enough airflow all around the unit. Check to see that the device is situated in a room that is sufficiently big and free of any obstacles that might restrict the airflow, such as plants or pieces of furniture. Because of this, heat can be dissipated more effectively, and cooling capacity may be increased.
You may contribute to the optimum functioning of your HVAC system and boost its cooling capabilities by ensuring that the airflow is clear and doing routine inspections and cleanings of the AC coils on a regular basis.
Contact Honeywell Customer Support
It is advised to contact Honeywell Tech Support if you have tried all the troubleshooting methods previously described and still can’t get your Honeywell thermostat to work properly. Their staff of qualified experts is equipped to identify and resolve a wide range of technical problems that can be impacting your thermostat and HVAC system.
You may speak with a skilled professional who can swiftly pinpoint the issue and provide suitable remedies by calling Honeywell Tech Support. They have dealt with a variety of problems, including defective capacitors, broken fan motors, compressors, or condensers, blown fuses, blocked sensors, damaged wiring, and other possible technical flaws.
Contacting Honeywell Tech Support enables you to get professional advice and troubleshooting hints that are targeted to your particular circumstance. The professionals will assist in making sure your thermostat is properly set up for your HVAC system and that any underlying problems are quickly fixed.
The model number of your thermostat, a description of the issue, and any error codes or indications seen on the thermostat should all be given to the expert. They will be better able to diagnose the problem and provide the best remedies as a result.
By contacting Honeywell Tech Support, you can get expert support, make sure that your Honeywell thermostat is operating at its peak efficiency, offering dependable temperature management, and improving your level of comfort.
Wrapping it up
You should be able to determine the causes of your Honeywell Thermostat flashing “Cool On” without blowing any cool air by using the troubleshooting techniques described previously. You may take the required actions to address the problem and get your thermostat functioning properly after you’ve identified the root cause.
To improve your comfort and energy efficiency, it’s crucial to take charge of your Honeywell thermostat and make use of its sophisticated capabilities. Your thermostat provides a variety of possibilities to tailor and optimise your home environment with features like humidification control, zone management, air exchange regulation, internal humidity detection, and HVAC system optimisation.
Explore the different settings and choices offered by your Honeywell thermostat and get acquainted with the user manual. This will enable you to take use of all of its features and modify it to suit your own requirements and tastes.
Your HVAC system and thermostat will operate at their peak efficiency if you do routine maintenance like changing the filters and cleaning the AC coils. Your Honeywell thermostat will work and operate at its best if you keep up with firmware upgrades and often check for any software or compatibility problems.
You can make your home pleasant and uniquely yours while optimising energy use by controlling your Honeywell thermostat and properly using its sophisticated capabilities. Use your Honeywell thermostat’s ease and advantages to create a more comfortable and effective home or business environment.

You May Enjoy Reading: How to Reset Honeywell Thermostat? (100%)
How to change Battery of Honeywell Thermostat (Within Minutes!)
