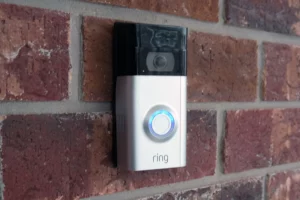
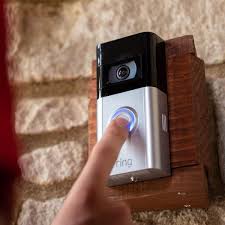
Even when you’re far away from your place, the ring doorbell makes it simpler for you to monitor the visitor at your front door. You can do all of this by using the Ring app installed on your smartphone. However, there’s a way through which you can directly stream the live video feed straight on your tablet, laptop or computer. This method will work for every Ring device and every model.
This comes into use when you’re at your place and desire to see a regular feed of what’s happening at your front doorway without even getting your smartphone. You can have a live view as you’re working on your laptop or computer. Or you can simply play it in the background, just in case, someone knocks at your front door.
In this read, we’ll discuss the steps to watch your live HD feeds and how you can have a two-way interaction with someone at your front door just through your Windows 10 device, Android, iOS, or Mac.

But before we start, it’s necessary to remember that using the feature of Live Video on the Ring Doorbell uses loads of battery time.
If you use a rechargeable battery package to operate your Ring Video Doorbell, then you’ll have to recharge the battery more often. Using the feature of live view consumes a lot of battery life. But if your doorbell camera is a wired one, then you don’t have to worry about the battery issue. Since it is wired, it is getting a steady flow of power from your electrical wires.
How You Can Watch Your Ring Video Doorbell On Your PC?
- First Step: Install the “Ring-Always Home” Application
I’ve mentioned the link for the apps and prepared the system needs. Pick the suitable link as per your preference and device:
- iPod, iPad, and iPhone touch (Click here) – need iOS 10.0 or following.
- Mac, iPad, and iPhone (Click here) – need OS X 10.11 or following, 64-bit processor.
- Android Device (Click here) – need Android 5.0 and following.
- Windows 10 Devices (Click Here) – need Windows 10 version 16299.0 or following (x64, x86).
One thing you should note, that after the 10th of April 2018, the Windows mobile device is not compatible with the Ring app. However, for Windows laptops, tablets, and desktops, the Ring app is still compatible with functioning on Windows 10 Fall Creators Update (version 1709) or later.
But if you’re running the Ring Video Doorbell on the Windows laptop, tablet or desktop, then the Ring Alarm feature will not perform. The alarm feature can only be performed using an iOS or Android device.
- Second Step: Make or Log in to your account
If you’re getting the Ring device for the first time, then you’ll be requested to create an account. Here are the steps to create an account:
- Open Your Ring app.
- Select the “Create Account” option.
- Follow the instructions provided in the app to set up your account
- Third Step: Click on “Set up device”
Click on the “Set up device” option, and then click on “Doorbells”.
- Fourth Step: Scan the MAC ID barcode or QR Code on the Ring device
You can get the MAC ID or QR Code at the backside of your Ring Video Doorbell.
- Aim the camera of your smartphone at the MAC ID or QR code which is present at the backside of your Ring Video Doorbell.
Sometimes you can also find the code either on the smart guide that arrived with your Ring device or on the packaging of your product.
- Now, get the code in your smartphone camera’s picture at the head of the screen.
- Once it has recognized the code, a green line (for the MAC ID barcode) or a green box (for QR code) will emerge on your screen, and then the setup will move to the following step.

One thing you should keep in mind is that if you’re facing any difficulties with scanning the MAC ID barcode or QR code, then you can simply choose “Set Up without scanning” and pick your Ring Video Doorbell Version to proceed with the setup method.
- Fifth Step: Define your location
If you’re setting the Ring device for the first time, then you’ll get a notification that requests you that your Ring app wants to use your smartphone’s location settings to pinpoint your place. You must allow the app to use your location, this will need you to enter your address.
Firstly put your address in the Ring app, then verify it. However, if you’ve set your location beforehand, then you can also choose it from the list of your places.
One more thing, if you haven’t put a specific location yet, then some of the features of the Ring Doorbell will not operate properly.
- Sixth Step: Name Your Doorbell
Pick a name of your preference for your Ring device to make it different from the other devices on your account by selecting the “custom” option, which is present at the end of the list. If you don’t want to name it, then you can also pick any name from the list of suggested names.
- Seventh Step: Make sure you’ve put your Ring Video Doorbell in Setup mode
The steps of putting your Ring Video Doorbell in setup mode vary from model to model. So, for this consult your quick guide for precise directions for your Ring model.
After this when you get a white spinning light on the exterior of your Ring Doorbell, click on the “Continue” option in your Ring app.
- Eight Step: Pair with your Ring Doorbell
For iOS, click on “Join”, when your Ring app requests to connect to the Ring Wi-Fi connection.
However, for Android, your Ring device would automatically pair with your Ring Wi-Fi connection. But if you want to proceed without scanning in the fourth step or your Ring device does not connect to your Ring W-Fi connection automatically, then here are steps you should follow:
- Tap on the “Home” button on your smartphone to leave your Ring app.
- Now, go to the settings.
- Tap on Wi-Fi.
If you’re an Android user, then you might’ve to go to the connection and then Wi-Fi.
- Choose your Ring Wi-Fi connection from the table of available connections. Here’s how the connection will appear:
Ring- accompanied by the end of six figures of the MAC ID.
Ring Setup- accompanied by the end of two figures of the MAC ID.
Once you’ve connected, shut the settings app and then revert to your Ring app.
- Ninth Step: Connect your Wi-Fi to your Ring Video Doorbell
Make sure you’re close to your modem and you’ve your Wi-Fi password handy.
- Pick your Wi-Fi connection
If you own more than one Wi-Fi connection, then pick the network which is nearest to the place where you’re installing Ring Video Doorbell.
- Insert your Wi-Fi password.
- Press “Continue”.
Please note that once you’ve connected your Ring doorbell to the Wi-Fi connection, it might upgrade its software. While it installs the update, you’ll see a white light flashing at the front of your Ring doorbell. Once the flashing light stops, you’ll know that the update is over and now you can proceed with the setup. However, refrain from ringing the doorbell while it is updating the software, as it will further prevent the update.

- Tenth Step: Examine Your Ring Device
Once your device is done with setup and updates, press the front switch to perform a test call. This test call will start up your device’s software and will make sure that your doorbell is set to work.
- Eleventh Step: Set up the feature of Live view
Now that you’ve successfully installed the Ring app on your smartphone and made your account, you can easily set the feature of live view on your Ring video doorbell.
This feature allows you to monitor a live stream from your front door through the doorbell camera at whatever time you want.
Here are the steps to set up a live view mode:
- On the “My device” option below your location, pick the device from which you want to obtain the live feed feature.
- Click on the “Live View” button to stream the live video feed from your Ring doorbell.
- To enable the two-way interaction feature between your doorbell and the phone, press “Talk”.
- Lastly, to close the live viewing streaming, press “End”.
Wrapping it up
I hope this read answered all your queries regarding the Ring Doorbell live video feature!
READ:

