

It was tremendously aggravating to get home after a long, exhausting day at work in the sweltering heat, only to find that my air conditioner had been acting up all day and hadn’t been able to cool the house properly. My first concern was the potentially substantial costs associated with having my air conditioning system serviced, despite the fact that the searing heat and muggy conditions inside the home were an urgent cause for concern.
Fortunately, I already had a Nest Thermostat installed, and it turned out to be a very helpful resource while I was investigating the problem. An error message, notably the E74 error, was shown on the thermostat. This problem message indicated that the Rh wire was not receiving electricity.
Internet research was my first port of call since I was adamant on solving the issue on my own and warding off the necessity for outside aid from a specialist. As time went on, it became abundantly clear that the mistake had been brought on by obstructed drain pipes inside the HVAC system. These clogs were the cause of a failure in the thermostat system, which resulted to the ‘No Power to Rh Wire’ error message being shown.
It is important to keep in mind that the error ‘No Power to Rh Wire’ on a Nest thermostat might be caused by a variety of different circumstances. For me, the problem was due to drain lines that were blocked with debris. However, other potential reasons might include a broken wire connection, a fuse that has blown, or a circuit breaker that has been triggered.
Homeowners will be able to take the proper actions to resolve the problem after they have identified the precise source of the mistake. In circumstances such as these, it is recommended that you seek the assistance of a professional, particularly if you are unsure of your capacity to handle the issue or if it includes electrical components, the diagnosis and repair of which call for specialised expertise.
I was able to identify and fix the ‘No Power to Rh Wire’ problem by making use of the error code that was supplied by the Nest Thermostat and completing extensive study online. As a result, I was able to bring back the functioning of my HVAC system and offer respite from the oppressive heat.
If your Nest thermostat is giving you an E74 error or a “no power to the Rh wire” error, try tightening any loose connections you find. If it doesn’t work, you may need to clear out the drain lines and inspect the HVAC condensate pump for blockages.
Check Your Nest Thermostat’s Rh Wire Connection
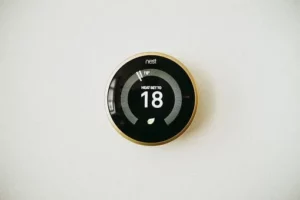
If you come across the Error E74, it means that there is an interruption in the power supply that is being sent to the Rh wire. Your first task should be to check that the Rh wire is appropriately connected to the appropriate terminals.
When a connection is lost, as it was when my Nest Thermostat was unable to charge, there is a good chance that the Rh wire also lost power. One example of this scenario is when my Nest Thermostat failed to charge.
If you installed your Nest Thermostat without using a C-wire, this might be one of the probable contributing factors that caused your thermostat to display the Delayed message.
The connection diagram for the thermostat may be accessed by going to the main error page and selecting the option to see the “Tech Info Diagram.”
If you are unsure about the placement of the Rh wire, consulting this schematic may be of great assistance since it will indicate in red any loose connections that are present.
Remove the display and do an inspection on the Rh wire if the connection to the Rh wire is shown in red.
Check to see that it has been properly inserted and is held in place firmly. If it is not securely fastened or easily moved, there is a good chance that the thermostat will be unable to establish a reliable connection.
If your Rh wire is correctly connected and the connection continues to hold, you may try to remedy the problem by using the following troubleshooting steps.
Verify the HVAC Float Switch
The valve that prevents water from overflowing into your house is called a condensate overflow switch, and it is part of your home’s heating, ventilation, and air conditioning system. It is often positioned near the Air Handler unit.
If the water is not flowing properly or if the drainage pipe gets blocked, this switch will immediately cut the power supply to your air conditioner. It was built for this very purpose.
In light of this, it is very important to examine the operation of the condensate switch in addition to ensuring that the Rh wire connection is secure, as was discussed before.
The switch is operated by a floating mechanism that, when it reaches its highest point owing to the buildup of water, disconnects the switch that is located within.
To determine whether or not the switch is operating correctly, give it a little shake or rattling. When the float switch is in the correct position, you will hear a clicking sound. This tells you that the switch is in the right place.
On the other hand, if the switch is not connected, the condensate overflow switch will have water in it, but you will not hear the clicking sound.
In this kind of situation, you need to continue by clearing up the drainage pipes and lowering the float by hand so that it is in the position where it should be. After that, wait a few minutes before turning on your thermostat again. This will give the system time to reset and go back to its usual state of functioning.
Verify the HVAC Float Switch
Your heating, ventilation, and air conditioning system has a condensate overflow switch that is normally located close to the Air Handler unit. The major function of this switch is to protect your home against flooding caused by an excessive amount of water.
If for some reason the water is not flowing properly or if your drainage pipe gets blocked, the condensate switch will activate and interrupt the power supply to your AC unit. This may happen for a variety of reasons.
As a result, when you have verified that the Rh wire is properly connected, the next step is to check that the condensate switch is operating as it should.
The switch is operated by a floating mechanism, which, when it reaches the top of its travels owing to the presence of water, disconnects the switch that is located within the housing.
Gently shaking or rattling the switch will allow you to determine whether or not it is operational. If you hear a clicking sound coming from the float switch, this indicates that it is in the right position.
On the other hand, if the switch is not connected, the condensate overflow switch will not make a clicking sound, and there will be water within the switch itself.
In such a scenario, you need to begin by clearing up the drainage pipes and lowering the float manually so that it is in the position where it should be. Wait a few minutes after performing these procedures before turning on your thermostat. This will give the system time to reset and go back to its usual state, allowing it to function normally again.
Examine the HVAC control unit fuse
Your heating, ventilation, and air conditioning system has a control unit fuse that might blow owing to changes in the power supply or weak connections. You’ll find this fuse on the right side of the HVAC unit; it’s linked to the control unit, and you can access it there.

Follow these procedures to determine whether or not the fuse has blown:
- Turn off the HVAC system.
- Remove the fuse from its socket.
- Inspect the fuse to see if the connection at the center is broken. Since the fuse has a transparent casing, you can easily see the wires inside.
- If you notice that the white, u-shaped wire is broken, it indicates that the fuse is blown.
When you are changing the fuse, you need to make sure that you get a model that is identical to the one that blew. The current rating of the fuse may be determined by the colour of the fuse. As a result, if you remove a fuse that is purple in colour, you should make it a point to replace it with another fuse that is likewise purple.
In addition, if you have had a blown fuse, there is a potential that there is an underlying problem with your HVAC system that caused the fuse to blow. This is a possibility if you have experienced a blown fuse. It is in your best interest to arrange an appointment with a qualified air conditioning expert as soon as possible in order to have any potential issues evaluated and fixed.
Switch out the HVAC contactor relay
Incorrectly functioning relays in the outdoor air conditioning equipment are one potential source of the E74 error message. However, it is not always possible to pinpoint the precise reason why an HVAC Contactor Relay fails to perform properly.
Because of its advanced age, the relay may cause sparks to fly in many different situations. In addition, there is a possibility that the coil may malfunction, which will lead to the fuse in the control unit being blown.
When dealing with a defective contactor relay, it is advisable to have it changed by a professional rather than trying to do it yourself. This is because professionals have the necessary tools and training to do this task successfully. This guarantees that there are no potential safety dangers involved, as well as that the operation is completed accurately.
In almost all circumstances, in addition to repairing the relay, it is also necessary to replace the fuse. In addition, it is essential to be aware that the model of the contactor relay may be different based on the particular make and capacity of the HVAC system that you have.
I brought up the potential of a relay problem in order to make sure that you are aware of it; nonetheless, it is highly recommended that you seek the aid of a professional in order to address and fix the problem.
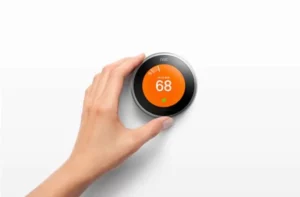
Nest Thermostat USB charging
If your electricity has been off for more than 12 hours or for any other reason, it is conceivable that the internal battery of the thermostat has run out since it did not have a power connection during that period. This may happen if the power was out for any reason.
The thermostat will begin charging the battery as soon as the electricity is restored, and it will do so before turning on. Your Nest Thermostat will display a flashing light to let you know when it is charging, and this will be obvious to you.
However, if the display on the Nest thermostat remains blank even after many hours have passed, it is possible that the internal battery will need to be manually charged.

To charge the battery, do the following procedures in order:
- Remove the thermostat from the wall plate.
- On the back of the thermostat, you will find two connectors, one of which will be a MicroUSB 2.0 port.
- Connect the MicroUSB 2.0 port to any compatible charger and allow it to charge for approximately an hour.
- After a couple of minutes, the display will boot up and become operational again.
By carrying out the procedures outlined in this guide, you will be able to give your Nest Thermostat’s internal battery a manual charge and guarantee that it continues to operate well.
Shop vac your drain lines
During the process of troubleshooting, if you come to the conclusion that the drain pipes in your home are blocked, there is no pressing need to call in a professional right away. You won’t have any trouble solving this problem on your own at home.
Follow these methods to clear up the drain pipes that have been clogged:
- Determine where the outside valve that is linked to the drain pipes is located.
- To remove the dirt and sludge from the drain lines, use a vacuum, ideally a strong one like a shop vac, and work your way through the pipes.
- Be patient during the procedure, since it may take some time to fully remove the obstruction that has been caused.
It is essential for drainage pipes to undergo routine maintenance and cleaning. The fact that these pipes transport a variety of fluids makes it likely that they may get clogged.
It is essential to be aware that blocked drain lines may be hazardous to your heating, ventilation, and air conditioning system. This is because they have the ability to cause damage to the compressor, which can be very costly to repair or replace.
Even though you can always call for expert help to clean the drain lines, performing hoover suction once every few months will often be adequate to keep them clear and avoid problems. You can always ask for professional assistance to clean the drain lines.
By carrying out these procedures, you will be able to successfully clear up blocked drain lines and ensure that your HVAC system continues to operate as it should.
Wrapping it up
The interface for controlling your heating, ventilation, and air-conditioning system is provided by your thermostat system. Consequently, making an investment in a thermostat that is trustworthy may be of great assistance in determining whether or not there are problems with your home’s heating and cooling systems.
Particularly well-known for its user-friendly troubleshooting tools, the Nest thermostat in particular offers detailed explanations of any errors that may occur.
The approaches to problem-solving that are detailed in this article have a good chance of being successful in the majority of instances when applied to the resolution of typical problems.
However, if none of the ways that were mentioned provide results that are acceptable, it is recommended that you seek the advice of a professional rather than trying to make more modifications on your own.
In addition, it is essential to place a high priority on safety measures in carrying out any of the aforementioned processes for troubleshooting.
Before you replace fuses, check for loose connections, or clean drain pipes, double check that the thermostat as well as the heating, ventilation and air conditioning system are turned off.
Additionally, after finishing the process of troubleshooting, you should wait a few minutes before turning the system back on. This is because the system needs to stabilise itself.
If you follow these suggestions, you will be able to do more efficient troubleshooting on your thermostat system and reduce the likelihood of accidents or further issues.
You Might Also Like: How to Change the Owner of Your Nest Thermostat?
Frequently Asked Questions
What does the Nest thermostat’s Rh wire represent?
The Rh wire on your Nest thermostat acts as the power input for the heating system of your air conditioning system particularly. Your air conditioner won’t work if you don’t connect this wire to the outlet, since it requires that connection to do its job.
R visits RC or RH?
The positioning of the R wire, namely whether or not it connects to the Rc or Rh terminals, is determined by the specific kind of thermostat that you have. For example, with the Nest Learning Thermostat R, the wire may be attached to either the Rc or Rh terminal depending on which one is most convenient. The Nest Thermostat E, on the other hand, just has a single R connection in its back.
How can I check the battery life of my Nest thermostat?
You may select the Quick see menu on your Nest Thermostat, and then browse to Settings, Technical Info, and finally Power, in order to see the current charge level of the device’s battery. You may determine the current battery level by looking at the information that is included in this menu and labelled with the word “Battery.”
Why does my Nest thermostat indicate to check again in 2 hours?
If the phrase “in 2 hours” appears on the screen of your Nest thermostat, it indicates that the device estimates that it will take the temperature to reach the newly set target temperature point in roughly two hours’ time.